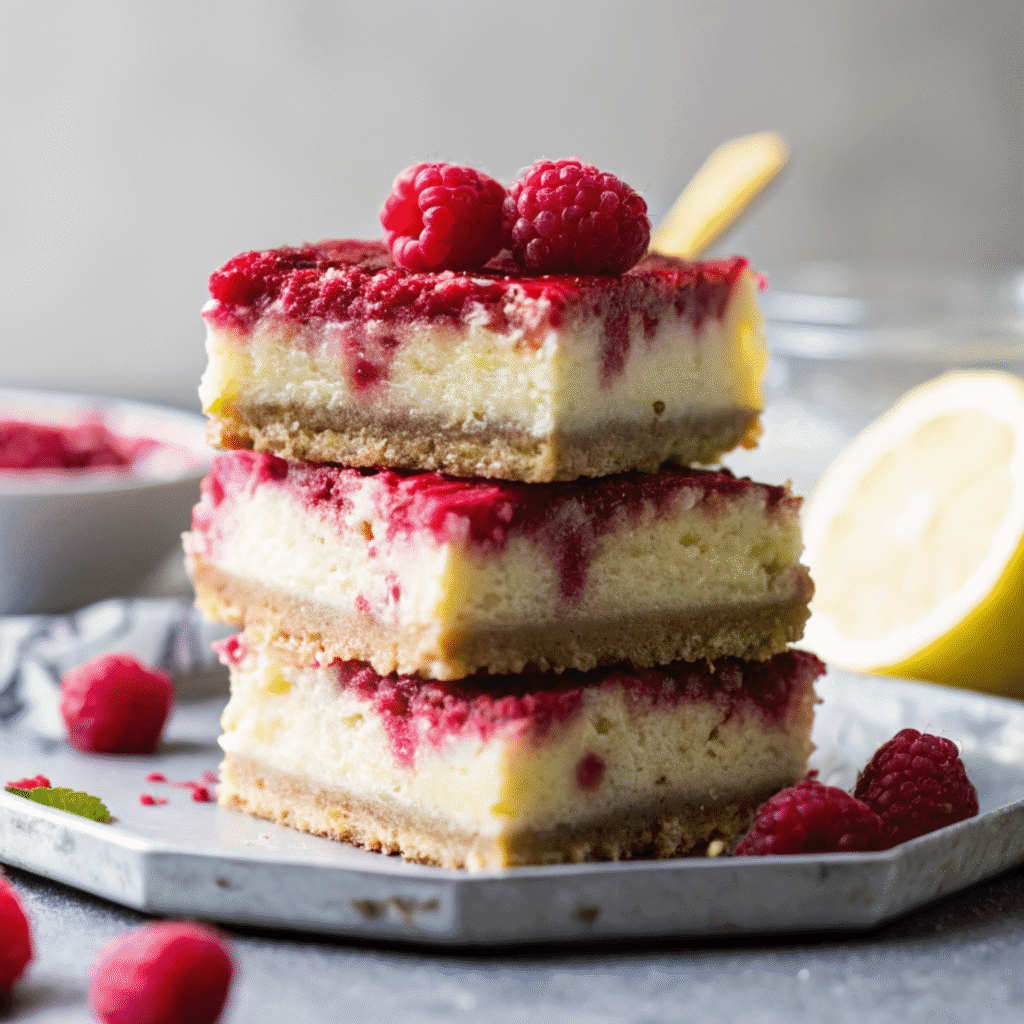
If you’re searching for the ultimate no-bake treat bursting with sunshine and berry flavor, you have to try this lemon raspberry bars recipe. Bright lemons and juicy raspberries join forces in a creamy, dreamy dessert that’s entirely vegan, gluten-free, and requires zero oven time. These no-bake lemon raspberry bars come together effortlessly, making them perfect for both busy weeknights and special gatherings. Each bite delivers tangy citrus, luscious berry sweetness, and a silky texture atop a wholesome nutty crust. Ready to make a dessert everyone will remember?

The Story & Connection
Memory and Meaning
Certain desserts just feel like a big hug, don’t they? Lemon and raspberry always spark the happiest memories for me: summer picnics in Brooklyn’s Prospect Park, laughter drifting across checkered blankets, and the shared joy of passing around homemade treats. My fixation with creating the perfect lemon raspberry bars recipe sprang from these simple, sunshiny moments. The vibrant mix of citrus and berries recalls both my grandmother’s lemon squares and my childhood love for picking raspberries fresh off the brambles. Bringing those flavors together in an easy, no-bake bar felt like the natural next chapter.
Kitchen Context and Emotion
I’m deeply passionate about desserts that feel indulgent but achievable, especially as the temperatures rise and turning on the oven becomes a chore. This lemon raspberry bars recipe was born out of that desire: stress-free, flavor-packed, and filled with feel-good ingredients. What makes this lemon raspberry bars recipe special is its totally dairy-free, plant-based nature, meaning everyone at your table, vegan, non-vegan, gluten-free, or just dessert lover, can taste the sunshine. Whipping up a batch never fails to lift my spirits, filling my apartment with a sweet, zesty scent long before the first bite is savored.
Ingredients List

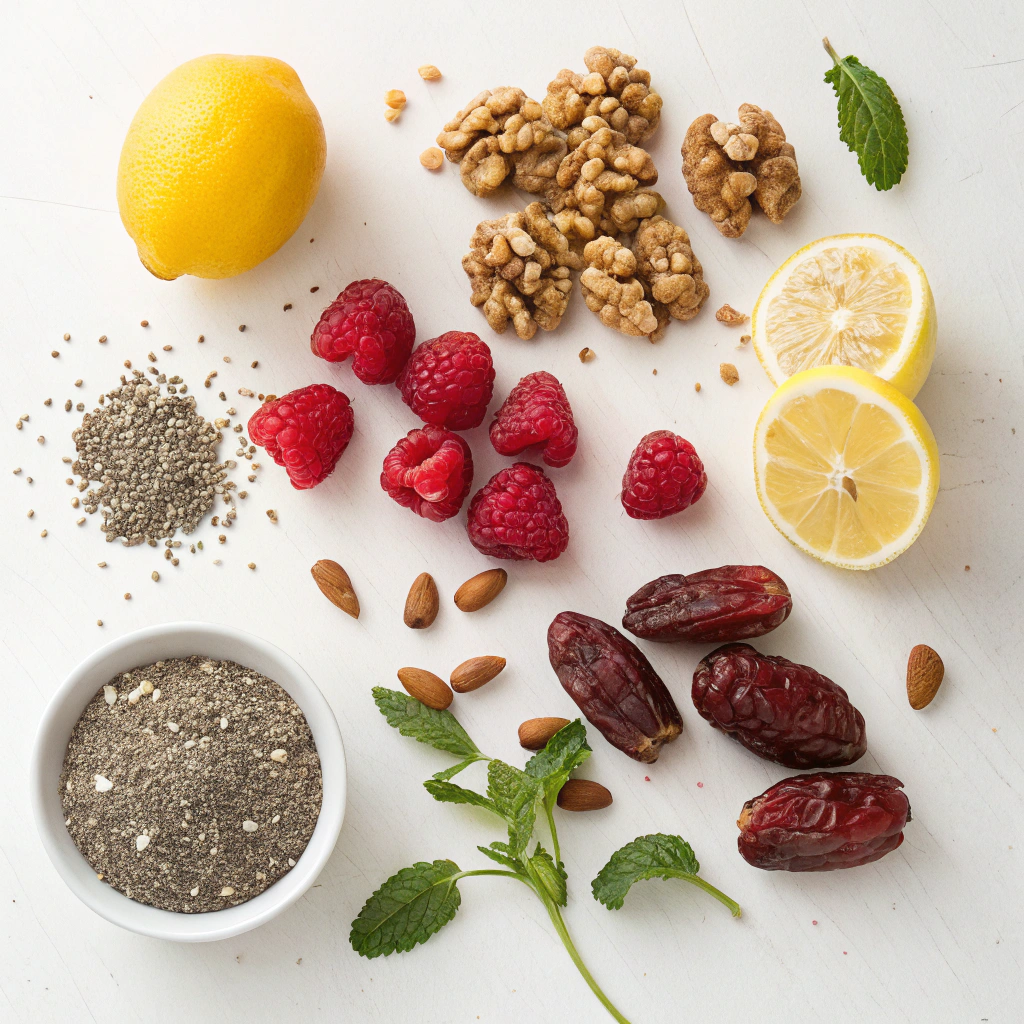
This no-bake lemon raspberry bars recipe uses simple, wholesome ingredients you might already have on hand:
| Component | Ingredient | Amount |
|---|---|---|
| Crust | Pitted Dates | 1 cup |
| Crust | Raw Walnuts or Almonds | 1 cup |
| Crust | Sea Salt | Pinch |
| Filling | Pre-soaked Raw Cashews | 3 cups |
| Filling | Lemon Juice | 1/2 cup |
| Filling | Melted Coconut Oil | 1/2 cup |
| Filling | Pure Maple Syrup | 1/2 cup |
| Filling | Lemon Zest | 2 teaspoons |
| Raspberry-Chia Topping | Fresh Raspberries | 1.5 cups |
| Raspberry-Chia Topping | Pure Maple Syrup | 1.5–2 tablespoons |
| Raspberry-Chia Topping | Chia Seeds | 1.5 tablespoons |
Unique or Sensory Ingredients
The heart of this lemon raspberry bars recipe is a silky cashew-lemon filling. Pre-soaked cashews transform into an ultra-creamy base that’s subtly sweet and beautifully tangy. Fresh lemon juice keeps each bite lively while lemon zest imparts fragrant notes throughout. Fresh raspberries get mashed together with a splash of maple syrup and a sprinkle of chia seeds, transforming into a sweet, ruby-hued jam that sets up in minutes. And for depth, the nutty crust, built from pitted dates and walnuts or almonds, offers natural sweetness, chew, and crunch. The best part? Since nothing gets baked, all the wholesome goodness and bright flavors stay intact, just the way nature intended in this lemon raspberry bars recipe
Smart Substitutions + Health
One reason this lemon raspberry bars recipe shines is its adaptability. Can’t find fresh raspberries? Frozen ones (thawed and well-drained) work great. Swap walnuts for almonds in the crust, or seeds for a nut-free twist. Maple syrup keeps things vegan, but agave or honey (for non-vegans) could be used in a pinch. The recipe is naturally free of gluten, dairy, refined sugar, and grains, giving you a nutritious treat as refreshing as it is satisfying. Consult the table below for useful swaps:
| If Allergic/Unavailable | Swap With |
|---|---|
| Walnuts/Almonds | Pumpkin/Sunflower Seeds |
| Maple Syrup | Agave or Honey |
| Cashews | Pre-soaked Macadamias |
| Fresh Raspberries | Thawed, well-drained frozen raspberries |
Step-by-Step Instructions
Detailed Steps with Tips For Lemon raspberry bars recipe
- Soak the cashews. Place cashews in a big bowl, cover with water, and let sit 3–4 hours. For a quicker method, pour boiling water over them and soak 30–60 minutes. Drain thoroughly for a creamy, lump-free filling.
- Make the raspberry-chia topping. Mash raspberries with 1.5–2 tablespoons maple syrup and chia seeds. Let rest for at least 10 minutes while prepping the rest. The mixture will thicken like jam, thanks to the chia seeds binding all the juices.
- Prepare the crust. In a food processor, pulse pitted dates, walnuts (or almonds), and a pinch of sea salt until a crumbly yet sticky dough forms. Press the crust mixture firmly into a parchment-lined 8×8 or 9×9-inch pan, then use the bottom of a glass or measuring cup to smooth it out and pack it tightly, making sure to get into every corner for a clean, even layer.
- Toss the soaked cashews, lemon juice, melted coconut oil, maple syrup, and lemon zest into a high-speed blender or food processor. Blend it all up until the mixture turns irresistibly smooth and creamy, pausing to scrape down the sides when needed. Give it time, the more it blends, the silkier and dreamier it gets
- Assemble the bars: Pour the creamy lemon filling over your crust and spread it out evenly. Then, drop spoonfuls of the raspberry-chia mixture across the top. Grab a skewer or knife and gently swirl it through to create pretty marbled patterns that look as good as they taste.
- Freeze and slice: Pop the whole pan into the freezer and let it chill for at least 2 to 3 hours, until everything is firm and set. When you’re ready to serve, take it out and let it sit at room temp for 10 to 15 minutes. Use a sharp knife for clean, satisfying slices. These are best when enjoyed cold and creamy.
- Store properly. Tuck any leftovers into an airtight container and keep them in the fridge for up to 5 days, or freeze for longer, about 3 weeks. When the weather’s toasty, grabbing one straight from the freezer makes for the coolest, most refreshing bite
Mistakes to Avoid
For effortless, creamy lemon raspberry bars recipe, avoid these common pitfalls:
- Skipping the cashew soak is the one thing you don’t want to do, it’s the key to getting that silky, dreamy texture just right.
- If the crust mixture is too wet or not blended enough, you might end up with a soggy base. Aim for a texture that holds together when pressed but isn’t sticky or damp. Give it a good firm press to help it set up nicely
- Skimping on chilling time might lead to bars that won’t slice cleanly. Patience is worth it.
- If using frozen raspberries, always thaw and drain well to avoid excess water in your jam topping.
- Swirling too aggressively can muddy the layers instead of marbling them, gentle is best.
Serving, Storing, and Variations
Creative Serving Suggestions
Honestly, these no-bake lemon raspberry bars recipe shine straight from the fridge, but there’s room for creativity. Top each slice with extra fresh raspberries, a little lemon zest, or a dollop of vegan whipped cream for flair. For a fancier touch, serve on individual plates with a sprinkle of powdered freeze-dried raspberries. Or pair with a scoop of vanilla coconut ice cream for an elevated summer dessert. They’re fabulous next to other citrusy treats, like those in my no-bake lemon cream cheese bars recipe, to make your dessert table pop with bright flavors and color.
Storage Tips and Dietary Versions
Proper storage means less stress and longer enjoyment. These lemon raspberry bars recipe keep best in a sealed container, chilled in the fridge (up to 5 days), or frozen (up to 3 weeks). For easy snacking, layer parchment between pieces to prevent sticking. You can prep them ahead for gatherings; just thaw slightly before serving for optimal creaminess. If you’d like a nut-free option, swap in pre-soaked sunflower seeds for both the crust and filling. And for other fun combos, experiment with blackberries, blueberries, or blood orange, it’s a flexible dessert, much like what you’ll find in my best citrus cheesecake no-bake recipe.
FAQs
Can I use frozen raspberries for no-bake lemon raspberry bars?
Yes, you can use frozen raspberries in this lemon raspberry bars recipe. Just make sure to thaw them completely and drain off any excess liquid before mashing with maple syrup and chia seeds. This prevents the topping from turning watery. For best results, let the mixture thicken as directed before swirling into your bars.
How do I make no-bake lemon raspberry bars firmer?
To make your no-bake lemon raspberry bars recipe firmer, ensure the cashews are fully blended and give the pan plenty of time in the freezer (at least 2–3 hours). If you need a sturdier bar, reduce the liquid slightly next time or add an extra tablespoon of coconut oil to help the filling set firmly.
Are lemon raspberry bars healthy?
This lemon raspberry bars recipe is packed with whole food ingredients: nuts for healthy fats and plant protein, fruit for vitamins and antioxidants, and natural sweeteners instead of processed sugar. While still a treat, these bars offer far more nutrition than most conventional desserts, and they’re gluten-free and dairy-free.
Can I make no-bake lemon raspberry bars ahead of time?
Absolutely! These lemon raspberry bars recipe are perfect for prepping ahead. Make them the night before your event, then chill or freeze until ready to serve. They slice best when slightly thawed, and actually taste even better after resting, as the flavors meld together beautifully over time.
Conclusion
This no-bake lemon raspberry bars recipe is sunshine in every creamy, tangy, berry-bright bite. Whether you’re hosting friends, need a summer potluck hero, or craving something sweet without the fuss of baking, these Lemon raspberry bars recipe deliver. Their ease, flexibility, and irresistible flavor make them a go-to in my own kitchen, and I know they’ll become a favorite in yours, too. If you enjoyed these, don’t miss other crowd-pleasing desserts like my easy Reese peanut butter no-bake bar, or explore all my no-bake creations for more inspiration. Let me know how your bars turn out and which flavor twists you fall in love with, happy (no) baking!
Print
Dreamy Lemon Raspberry Bars Recipe – No-Bake, Vegan, and So Easy
- Total Time: 4 hours
- Yield: 12 bars 1x
- Diet: Vegan
Description
Bright, zesty, and utterly dreamy, these vegan no-bake lemon raspberry bars are a delightful treat that bring sunshine to your day. With creamy cashew filling, a chewy date-nut crust, and a vibrant raspberry-chia swirl, they’re playful, approachable, and perfect whenever you crave something sweet yet light.
Ingredients
Crust:
1 cup Pitted Dates
1 cup raw Walnuts or Almonds
pinch of sea salt
Filling:
3 cups pre-soaked Raw Cashews
1/2 cup lemon juice
1/2 cup melted Coconut Oil
1/2 cup Pure Maple Syrup
2 teaspoons lemon zest
Raspberry-Chia Topping:
1.5 cups fresh raspberries (*see notes below)
1.5–2 tablespoons Pure Maple Syrup
1.5 tablespoons Chia Seeds
Instructions
- Soak the cashews. Place cashews in a big bowl, cover with water, and let sit 3–4 hours. For a quicker method, pour boiling water over them and soak 30–60 minutes. Drain thoroughly for a creamy, lump-free filling.
- Make the raspberry-chia topping. Mash raspberries with 1.5–2 tablespoons maple syrup and chia seeds. Let rest for at least 10 minutes while prepping the rest. The mixture will thicken like jam, thanks to the chia seeds binding all the juices.
- Prepare the crust. In a food processor, pulse pitted dates, walnuts (or almonds), and a pinch of sea salt until a crumbly yet sticky dough forms. Press the crust mixture firmly into a parchment-lined 8×8 or 9×9-inch pan, then use the bottom of a glass or measuring cup to smooth it out and pack it tightly, making sure to get into every corner for a clean, even layer.
- Toss the soaked cashews, lemon juice, melted coconut oil, maple syrup, and lemon zest into a high-speed blender or food processor. Blend it all up until the mixture turns irresistibly smooth and creamy, pausing to scrape down the sides when needed. Give it time, the more it blends, the silkier and dreamier it gets
- Assemble the bars: Pour the creamy lemon filling over your crust and spread it out evenly. Then, drop spoonfuls of the raspberry-chia mixture across the top. Grab a skewer or knife and gently swirl it through to create pretty marbled patterns that look as good as they taste.
- Freeze and slice: Pop the whole pan into the freezer and let it chill for at least 2 to 3 hours, until everything is firm and set. When you’re ready to serve, take it out and let it sit at room temp for 10 to 15 minutes. Use a sharp knife for clean, satisfying slices. These are best when enjoyed cold and creamy.
- Store properly. Tuck any leftovers into an airtight container and keep them in the fridge for up to 5 days, or freeze for longer, about 3 weeks. When the weather’s toasty, grabbing one straight from the freezer makes for the coolest, most refreshing bite
Notes
Line the pan with parchment for easy bar removal. Thaw bars briefly for creamy texture.
If cashew blend is too thick, add a splash of water. Use fresh or thawed raspberries in the topping. Keep leftovers chilled, aggregate flavor gets better over time.
- Prep Time: 4 hours (including soak)
- Cook Time: 0 minutes
- Category: Dessert
- Method: No‑Bake
- Cuisine: American
Nutrition
- Serving Size: 1 bar
- Calories: 243
- Sugar: —
- Sodium: —
- Fat: 20g
- Saturated Fat: —
- Unsaturated Fat: —
- Trans Fat: 0g
- Carbohydrates: 17g
- Fiber: —
- Protein: 3g
- Cholesterol: 0mg

